This week is light on cooking. I'm planning a frittata for breakfasts and leftovers for lunches.
Sunday - Family dinner
Monday - Cook-out
Tuesday - Chopped salad with black beans
Wednesday - Tomato cream soup with grilled cheese and spinach balls
Thursday - Buffalo chicken lettuce wraps
Friday - Breakfast tacos with refried beans
Saturday - Date night = Dinner out!
For more menu ideas, check out Menu Plan Monday at Organizing Junkie.
Monday, September 5, 2011
Thursday, September 1, 2011
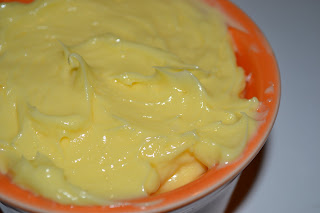
Queso Blanco
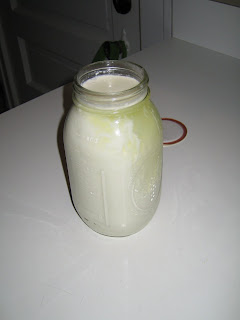
We had some extra milk a few weeks ago, so I decided to try something new. Queso blanco is a mild white cheese and is frequently used in Mexican dishes. It's not a melting cheese, so it's a good cheese for stir fries, soups and deep frying, according to my trusty copy of Home Cheese Making.
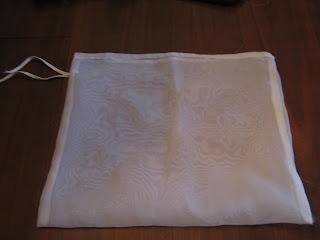
I heated 1/2 gallon of milk to about 190 degrees then slowly stirred in 2 T of apple cider vinegar, about 1 tsp at a time. You only want to add enough vinegar to curdle the milk. If you add too much, you may be able to taste it in the cheese. Once the curds started to separate from the whey, I spooned them into a sieve lined with butter muslin.
 Next, I gathered up the corners and used a rubber band to hold them closed. Then I looped the rubber band over a cabinet knob, and let the cheese drip into a bowl for about 2 hours.


The result was a soft yet slightly crumbly cheese with little flavor. This cheese definitely needs some salt and/or herbs added to liven it up a bit. We used the cheese as a topping on black bean burgers; we also mixed it with garlic powder, oregano and mozzarella and used it to make a stuffed crust pizza! I think next time I would not let the cheese drip quite so long so as to keep it more moist.
I heated 1/2 gallon of milk to about 190 degrees then slowly stirred in 2 T of apple cider vinegar, about 1 tsp at a time. You only want to add enough vinegar to curdle the milk. If you add too much, you may be able to taste it in the cheese. Once the curds started to separate from the whey, I spooned them into a sieve lined with butter muslin.


The result was a soft yet slightly crumbly cheese with little flavor. This cheese definitely needs some salt and/or herbs added to liven it up a bit. We used the cheese as a topping on black bean burgers; we also mixed it with garlic powder, oregano and mozzarella and used it to make a stuffed crust pizza! I think next time I would not let the cheese drip quite so long so as to keep it more moist.
Wednesday, August 31, 2011
Getting Away from the Grocery Store Mentality
I definitely have the grocery store mentality - whatever food I want should be available for purchase all the time. Now that I've written that out, it sounds so completely self-absorbed and irrational. Yet, I think most Americans are in the same boat. Who doesn't get irritated to find that some food item that they want is sold out?
Now that we are trying to eat more seasonally and locally, I'm getting frustrated with the inconsistent supply of things I want, specifically milk. Most weekends we go to the farmer's market on Friday (produce/eggs), grocery shopping on Saturday (produce/most other things), and then I hit the indoor farmer's market as I have time (eggs/meat/milk), usually on Sunday. The indoor farmer's market is the only somewhat convenient source of local milk I have right now. If they are out, as they were this week, I have to go back to the grocery store to buy conventional milk or drive all the way across the city to go to Whole Foods -- not the most efficient use of time or gas.
What's the solution? I'm still trying to figure that out, but first I think I need to take a deep breath. It's not the end of the world that I made yogurt with conventional milk this week. I suppose that the next time the indoor farmer's market is out of milk, I could simply accept it as a part of supporting small farms and co-ops and do without for the week. I also need to consider whether I could buy local milk in bulk and freeze it. That's what I plan to do with bacon as soon as it's available next month. Freezer space is an ongoing issue here, so that will take some consideration.
Friday, August 26, 2011
Food Budget
I've always considered myself to be frugal. I still do, but my family might disagree. "You pay how much for eggs?!?!" However, I think being frugal means making thoughtful financial decisions and also not being afraid to spend when necessary. J and I think high quality food is necessary. I go out of my way to purchase grass-fed beef almost exclusively and pastured chicken as much as possible. I also splurge on free range eggs from the farmer's market and local, mostly-grass fed milk in glass bottles. These purchases are important for our health and for environmental reasons. Because these items are so expensive, we don't use a lot of them, i.e. we eat quite a few meatless meals each week.
We are at the point now where we need to trim our budget a bit. Actually, the problem is that we need to keep our budget where it is but get our expenditures in line with our budget. Common problem, right? We have identified several areas where we can cut back, most notably eating at restaurants. We both agreed, however, that while we need to be more cognizant of how we spend our food money, we don't want to sacrifice quality. As a compromise I plan to get back into couponing. As much as we try to avoid processed and packaged food, there are certain items that we can't seem to get away from like ketchup and taco shells. We might as well use coupons and shop the sales to reduce costs a bit. We also need to be less wasteful -- not buying too much and eating everything that we buy. I'm hoping these small changes as well as a heightened awareness of where our money goes will make enough of a dent in our expenses that we won't have to feel guilty about spending money on good food.
I've been wondering how some of our homemade items compare cost-wise to similar prepared items from the store. I think I may do some research while grocery shopping this weekend.
Friday, August 19, 2011
My First Sweater
Last year for my birthday J bought me a bunch of knitting needles and other supplies. He also purchased a skein of yarn that he liked so that I could make something for him. With the help of Knitting For Dummies, I managed to learn to cast on, knit and purl. I decided to make J a scarf, but since I didn't really know how to read patterns, I just started knitting. I used way too small of a needle for really bulky yarn, and the result was a really wide, really stiff scarf that took forever to make. I view the project as a bit of a waste of yarn, but he insists he likes it. At least he will have a toasty warm neck this winter!
After that, it seemed like a good time to take some lessons. Since February I've been taking lessons at a local yarn shop once a week (usually). After learning some new techniques and practicing a few patterns, I decided to jump right in with a short-sleeved sweater. This was circa March. I'm just now nearing the end, and I can't wait to try on the finished product. After all of the time, aggravation and money, I'm a little worried that it's not going to fit.
In the photos below, you can see that I just finished the ribbing on the right sleeve, and I'm still working on the left sleeve. The neckline will be the last thing to do before sewing up the sides.


Simultaneously I've started working on a hat (using a pattern from The Purl Bee) for J using really nice hand-dyed alpaca yarn from 84 Alpacas. We stumbled across this delightful little yarn store while exploring Washington County several weeks ago. I don't think I'm going to have enough yarn to finish the hat, so we'll have to go back soon and get some more.

Monday, August 15, 2011
Yogurt Update
I'm still making yogurt about every two weeks -- two quarts at a time. A couple of months ago I came across a new method on Passionate Homemaking, and it is so much faster than what I was doing! Yesterday it only took me about 30 minutes to go from milk in the refrigerator to milk culturing on the counter. With the old method, I heated and cooled the milk in the jars which took for.ev.er. This method heats and cools the milk in the saucepan, so it takes a little bit more attention to make sure that I don't burn the milk. However, the added speed and convenience are totally worth it.
I start with a half gallon of the best quality milk I can find. This week it was Natural by Nature Grass-fed Milk, but I prefer to use PastureMaid's non-homogenized milk in glass bottles that I can get at the indoor farmer's market.
I pour the milk and 1 T vanilla into a 3 1/2 qt saucepan and heat over medium until it reaches 180 degrees (about 20 minutes). Next I set the saucepan in a sinkful of cold water and let it cool (about 10 minutes) to about 112 degrees. Per the instructions on my culture packet, I sprinkle the culture over the milk and let it rehydrate for two minutes. Then I gently swirl the culture into the milk.
I carefully pour the milk into two quart-size canning jars and screw on the caps. Then I place both jars in my largest stockpot and fill it with hot tap water. Then I set it on the counter and let it culture for 12+ hours. Since I tend to make this in the early evening and let it culture all night, I usually refresh the hot water before I go to bed.

Technically, I'm supposed to culture the yogurt at 110 degrees. My yogurt would probably turn out thicker if I did so, but that temperature is difficult to maintain without a yogurt maker. The best way to come close to that is probably to use the cooler to incubate the yogurt. Per Kitchen Stewardship's instructions, I fill my stockpot with water and bring it to a boil. Then I line a large cooler with a towel (so the pot does not melt the plastic) and place the pot of steaming hot water and the yogurt jars side-by-side in the cooler. With the lid on tight, it stays moist and steamy in there for a long time. Once it's done incubating, move the yogurt to the fridge to chill. I really can't be bothered to dig out the cooler right now, but as we move into fall and winter, I'll probably have to do so.
Sunday, August 14, 2011
Peaches!
Mama K called me at work on Thursday to see if I wanted her to pick me up some peaches at Kaelin Farm Market. Yes, please, but not too many. Ha. I came home to a half bushel of very ripe peaches on my dining room table.


Friday night we processed 30 c of peaches and stuck them in the freezer.


Saturday night we canned 6 quarts of peaches.


This afternoon I made a peach pie.


And now the peaches are gone!


Friday night we processed 30 c of peaches and stuck them in the freezer.


Saturday night we canned 6 quarts of peaches.


This afternoon I made a peach pie.


And now the peaches are gone!
Thursday, August 11, 2011
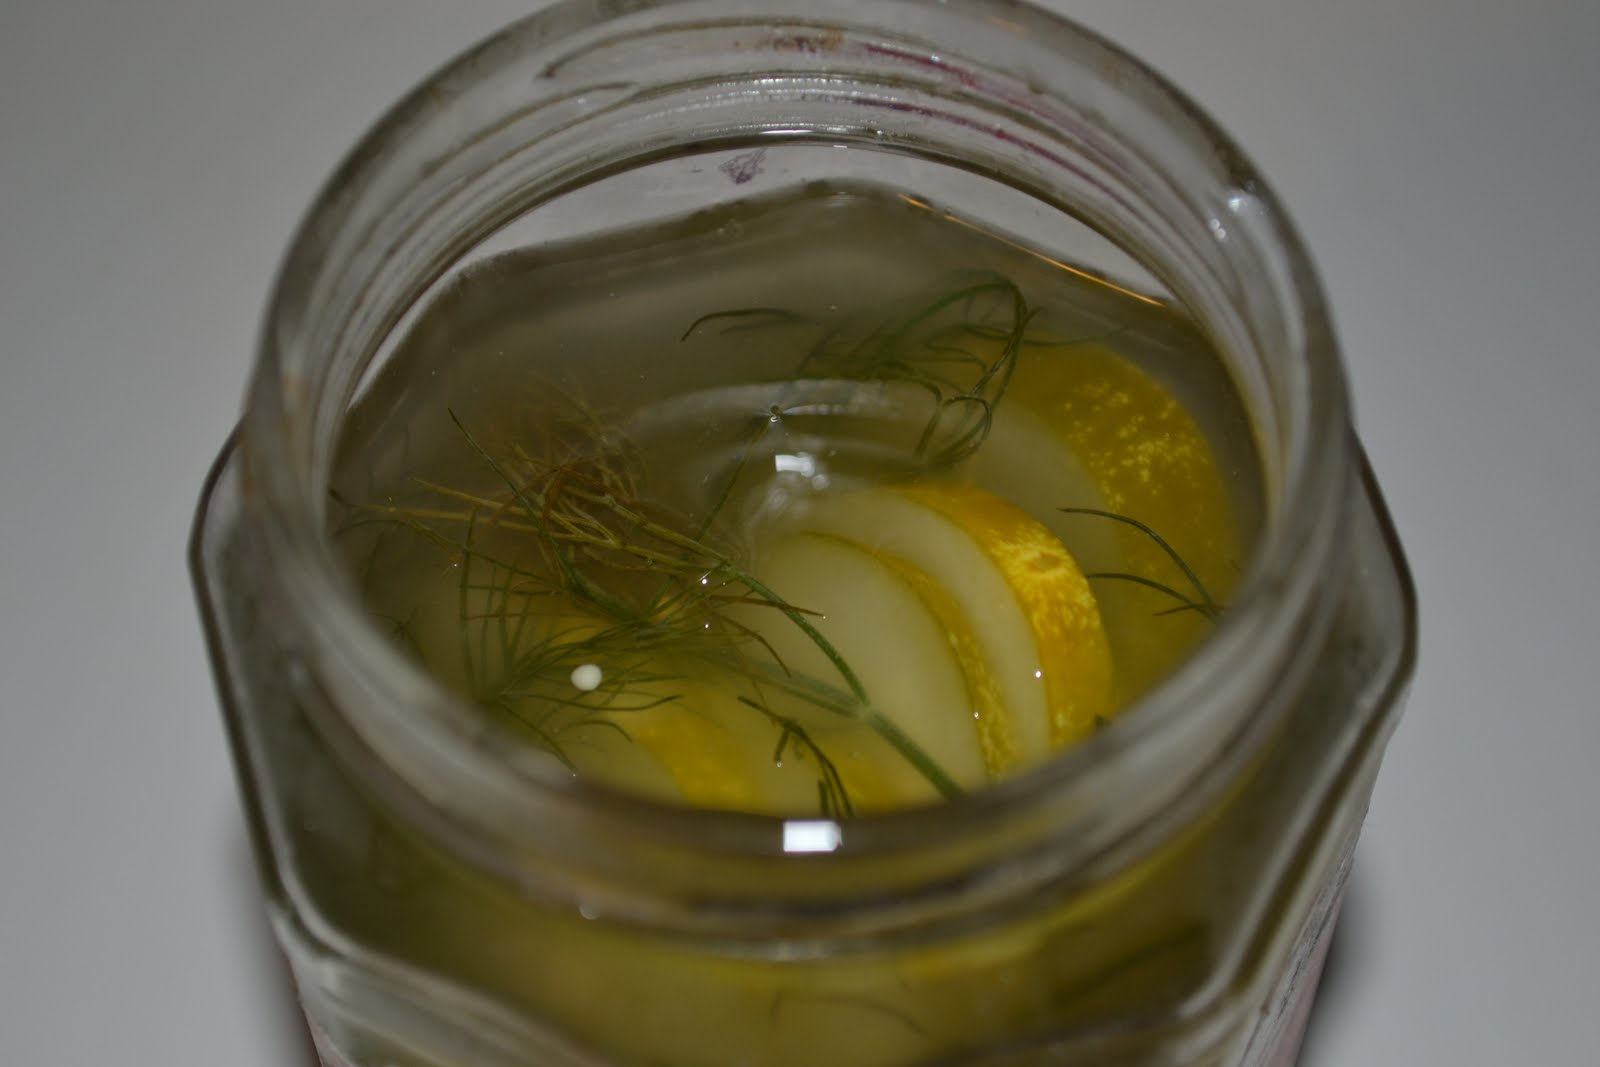
Lacto-fermented Pickles
I was so excited to make lacto-fermented pickle slices with cucumbers from my garden this year. I'm not sure what I was expecting, and I don't even know how to describe what I got. Effervescent pickles? The pickles have a certain fizziness that triggers my "don't eat that" reflex. That's usually how you tell if something's gone bad, right?

I'm trying to eat them. We'll see...
I'm trying to eat them. We'll see...
Monday, August 8, 2011
Home Sweet Home
We just got back from vacation on Saturday -- 2 weeks of eating fried chicken, french fries, greasy sandwiches and very few vegetables. I couldn't wait to get back into the kitchen! I hit up the farmer's market yesterday morning to pick up good eggs, milk, beef and veggies. J made tomato sauce with the San Marzano tomatoes from our garden. I used the milk to make 2 quarts of yogurt. (I have a new and improved yogurt method that I will post about soon.) I also sliced up one of our pickling cucumbers to try out Nourishing Traditions' lacto-fermented pickles. They are currently fermenting on the counter, and I have to wait until tomorrow to try them.
Unfortunately our garden suffered a bit while we were gone even though Mama K came over to water regularly. The sugar snap pea plants are completely done, as in dried out and brown. I'm afraid we may have completely missed bean season, although I'm holding out hope that another batch will appear. Our herbs were huge and mostly gone to seed. Note for next year -- don't go on vacation during peak produce season! Luckily our tomatoes have been loving the hot weather. The Green Zebra is literally breaking under the weight of all the tomatoes. Mama K picked a few ripe tomatoes while we were gone and put them in the fridge for us. We sliced up the most amazing tomato last night. I think it was a Brandywine.

I almost forgot...we came back from vacation with 10 lbs of frozen sour cherries! Take a look at the tasty pie I made.

Sunday, July 17, 2011
Garden Update
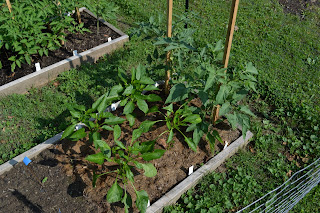
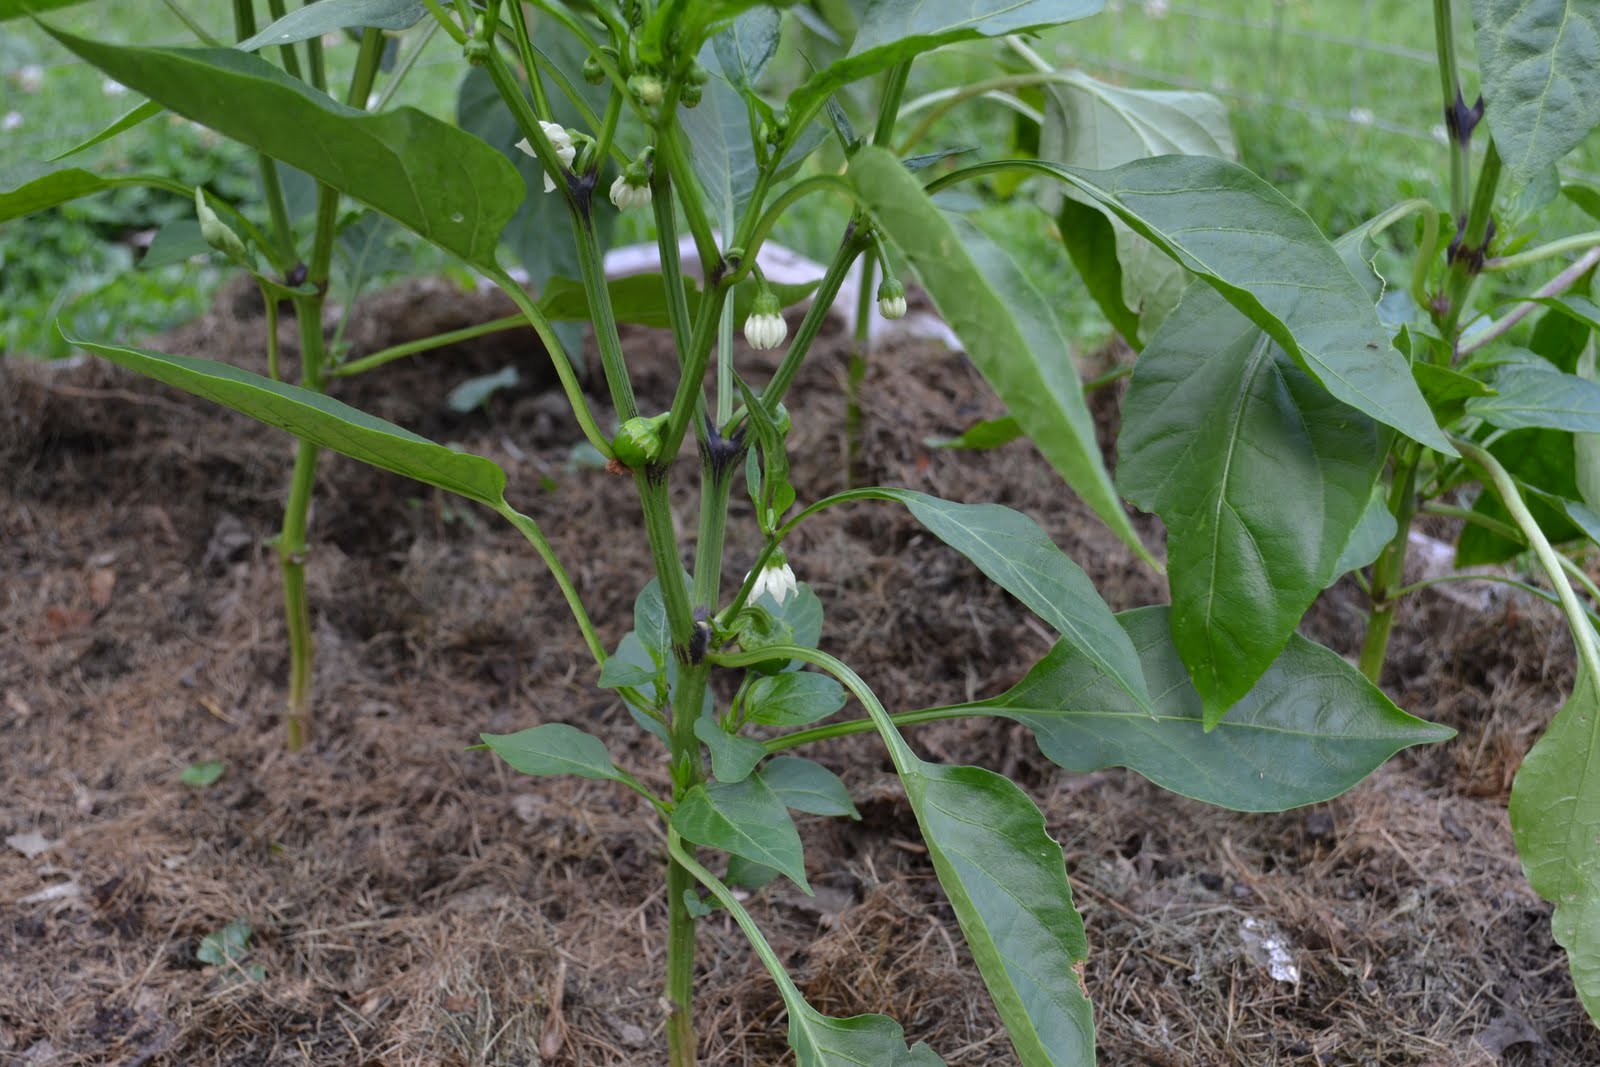
Our little garden is cruising right along. We've had two good harvests of sugar snap peas, and we will probably do one more tonight. The plants don't seem to be re-generating peas as quickly and some of the leaves are turning yellowish brown, so we may be near then end of the season for sugar snap peas.
Next up to eat are the peppers. We plan to use our banana peppers to make stuffed peppers tomorrow night, and the green peppers should be great in chicken fajitas on Tuesday.
We've just started to see the first reddening of our tomatoes and should have a good crop in a few weeks. A few cucumbers have appeared and the largest is probably 3 inches long. Our herbs are growing like crazy, and we have a batch of dill drying in the basement.
Breaking Down Chickens
J and I attended a knife skills class at Crate a few months ago, and one of the things we learned was how to break down a chicken. This part of the instruction was not hands-on, so I was nervous that it would be more difficult than the chef made it seem. I finally had the chance to put what I learned to use this weekend, and it was so easy!
I ordered 4 freshly butchered Freedom Ranger chickens from Freedom Farms and picked them up on Friday at the farmer's market. The chickens were $15 each and weighed probably 4-5 lbs each. On Saturday morning, J sharpened our knives and I went to town on the chickens.
First, I removed the legs and thighs from the body. Then I removed the breasts and finally the wings. I separated the legs and thighs and de-boned the thighs. I also removed the skin from the breasts. I saved the carcasses and thigh bones for broth. I vacuum-sealed all the pieces into the portion sizes we use the most: 1-2 breasts per package, 4 thighs per package, 4 legs per package and all 8 wings in one package. Our freezer is full! We really haven't been eating much chicken lately, so this stockpile should last for several months. We also still have a whole chicken in the freezer that I bought from another farmer's market vendor a few weeks ago.

It took me probably 30-40 minutes to break down the chickens and then another few minutes to vacuum-seal all the bags. I feel somewhat guilty using so much plastic, but if I want to eat pastured chicken, I have to have a way to store it. It's really a catch-22. For humanely-raised and butchered meat to be affordable, it really needs to be bought in bulk and in season and then used up over time. Vacuum-sealing and freezing is the only good way to do this. I could buy meat as we need it from the grocery store and have the butcher just wrap it in paper, but then we are supporting factory farming. I figure, we are trying to reduce our use of plastics in other areas, so freezing meat in plastic is an okay compromise in order to have healthy meat to eat throughout the year.
Friday, July 1, 2011
Homemade Butter
We try really hard to keep up with our meal plan each week so that we don't let ingredients go to waste. Sometimes, however, things just don't go according to plan. This past week we ended up with an unused pint of Natural by Nature grass-fed cream that we had intended to use for pasta with cream sauce. As we neared the cream's expiration date, I went searching through Home Cheese Making hoping to find a cheese recipe that called for a pint of cream. It turns out I was making things too complicated -- the best use for leftover cream is to make homemade butter with it. I was amazed at how easy this was. To make cultured butter, you can apparently add a bit of yogurt to the cream in the first step and allow it to sit on the counter overnight before shaking. Easy peasy :-)
1) Pour cream into a clean mason jar; tightly screw on lid.
2) Allow to sit on the counter for a while to bring it to room temperature.
3) Shake the jar vigorously for approx. 5 mins or until you have butter.
4) Pour off (and reserve) buttermilk.
5) Scoop butter into a bowl; add cold water.
6) Knead butter with a spoon to release additional buttermilk.
7) Pour off water; add more cold water and repeat process until water stays clear.
8) Refrigerate butter.
Wednesday, June 22, 2011
Garden: Before and After
Wow, the garden has grown in the last few weeks. Our sugar snap peas have outgrown their trellis and are taking over the cucumber supports. We have tiny green tomatoes on most of the tomato plants. A few peppers have even made an appearance. While the dill is quite hearty, we are still waiting for the rest of the herbs to take off.
Here are some photos taken on June 5:


Just 6 days later:


And 8 days after that:


Here are some photos taken on June 5:


Just 6 days later:


And 8 days after that:


Friday, June 10, 2011
Yogurt Debacle
I just wanted to give a quick rundown of my latest batch of yogurt. Since it's been so hot, I decided to give the crockpot method another shot. I added a half gallon of my usual creamline milk and followed the usual instructions. I did not have enough of either store bought yogurt or cultures, so I used some of both as my starter...one packet of cultures and 1/4 c of Stonyfield whole milk yogurt. My yogurt incubated for about 7 hours. The result was a runny gooey mess. I used it to make smoothies all week. I'm not sure what went wrong. Perhaps the crockpot/towel method just doesn't hold in enough heat? Perhaps Stonyfield isn't the best brand to use as a starter? I think I'll stick with my cultures from here on out.
How does your garden grow?
In the few weeks since I last posted, our garden has grown like crazy! The sugar snap peas are almost to the top of the trellis we built (about 3 feet or so). The tomato and pepper plants look very hardy and have little blossoms starting to open. The pole beans and cucumbers are several inches tall and, after a slow start, our herbs have gotten going. The only issue we have had is with the bush beans. We soaked all the bean seeds (pole and bush) for 15 minutes or so prior to planting. The pole beans all shot up in no time. After waiting and waiting, one bush bean sprout (out of four seeds planted) shot out of the ground. It seriously went from zero to 2 inches over night. Since then it's been poking along. The other 3 seeds never made an appearance, and it didn't help that someone stepped in that part of the bed. A few days ago I decided to try again. I put the seeds in water and promptly forgot about them, so they got soaked for at least an hour and a half. No sign of any new sprouts yet, and I'm a little worried that the rapidly growing pole bean plants might be providing too much shade.
I should have some fantastic pictures to post soon because we just got a fancy new camera. I waiting for the card reader to arrive in the mail, so I can transfer the photos to the computer.
I should have some fantastic pictures to post soon because we just got a fancy new camera. I waiting for the card reader to arrive in the mail, so I can transfer the photos to the computer.
Saturday, May 21, 2011
Plants are in the ground
Since we are pretty sure that there will not be any more frosts, we decided to go ahead and put all of our plants in the garden beds. I used the Gardner's Supply Company's garden planning tool to lay-out the garden ahead of time. I wish I could figure out how to post my diagram. Each 6x2 bed contains 12 square foot plots. In the first bed, we have 2 peas (planted a few weeks ago and growing well!), 2 cucumbers, a pole bean and a bush bean on one end, and 6 tomatoes on the other end. The second bed contains two more tomatoes and 4 peppers on one end, and a mix of herbs -- basil (2), cilantro (2), dill, green onion -- on the other end. All of the herbs, as well as the beans and cucumbers, we planted from seed. We obtained the tomato and pepper plants from a local nursery. This is all a big experiment for us, so we are excited to see the results. Crossing my fingers that everything grows :-)
On another note, I need to post about my ongoing craft projects. I just started knitting a shawl this morning, and I'm still working on my sweater. I also have started sewing an easy skirt, but I need to swing by Mama K's to get additional instructions.
On another note, I need to post about my ongoing craft projects. I just started knitting a shawl this morning, and I'm still working on my sweater. I also have started sewing an easy skirt, but I need to swing by Mama K's to get additional instructions.
Saturday, May 14, 2011
Tomato Plants
My main gardening goal for this year is to can tomatoes. We go through a ridiculous amount of canned tomatoes throughout the year, and I would love to have a homemade stash on hand. Lately, we've been buying canned San Marzano tomatoes because they are supposed to be the best for sauce (and that's what all the Food Network chefs use!). Luckily, Grow Pittsburgh is offering San Marzano starts this year, so we took a trip to a nearby nursery yesterday to pick up a few. They only had 5 plants, so we cleaned them out. We also got an Italian Sweet, a Brandywine and a Green Zebra. One the pepper side, we got two Bounty Sweet Banana Pepper plants and one each of New Ace and Gourmet Orange. I had planned to grow heirloom peppers from seed, but it didn't work out for me. The lack of direct sunlight coming into our house should help keep it cool this summer, but it's not good for growing things. We are waiting until next weekend to plant them outside just to make sure we are really truly frost-free.


In other garden news, the pea seeds I recently planted in our garden box sprouted this week and are growing quickly. Also, our lettuce is doing well, but I should have planted much more. I'll have to expand for the fall crop of lettuce.


In other garden news, the pea seeds I recently planted in our garden box sprouted this week and are growing quickly. Also, our lettuce is doing well, but I should have planted much more. I'll have to expand for the fall crop of lettuce.
Sunday, May 1, 2011
Cloth Bags and Napkins
I hope to start using my sewing machine more in the upcoming weeks. I bought 3 patterns on sale at JoAnn Fabrics yesterday, and maybe I can convince Mama K to help me get started next weekend. In the meantime, I've been refreshing my sewing skills with a few projects.
Last weekend I stitched up two produce bags to use at the grocery store instead of those clear plastic bags that the store provides. About a year or so ago, I made two by combining instructions from a few different sites. This time, I tried to take my lessons learned and improve the end product. I used sheer fabric leftover from last time and just cut it into 2 equal rectangles. I did a double-fold hem along each short edge (top of the bag) and then folded the fabric in half and did a french seam along the sides. I inserted a piece of bias tape into the seam to use as a tie. I'm very pleased with the results. If I make any more, I intend to re-purpose old sheer curtains instead of purchasing new fabric.
This weekend I finished up a cloth napkin project I started around the same time as I made the original cloth bags. Although we've been regularly using the napkins I made back then, they are a bit too small. For this batch, I cut the fabric into 16" squares -- unfortunately, I only had enough for two napkins -- and then I did a double-fold hem along each edge. The finished products are about 15" square and just the right size.

Just because I think it's cool, check out my vintage green Singer sewing machine. It even has a lid that goes over it and snaps on to form its own carrying case.

According to my Google search, these machines were made between 1955 and 1964. The copyright on the machine manual is 1958. Also, please notice my awesome vintage pink plaid sewing basket. Inside, the markings on my measuring tape indicate it was made in West Germany (fyi - the wall fell in 1989). The trick to getting these ancient goodies? You need relatives who purchase things at yard sales and Goodwill just because they are in good condition and someone they know might need/use them some day. I believe my grandmother gave the sewing machine (along with many other "treasures") to my mother years ago just in case one of us girls wanted one. Turns out she was right this time. I'm pretty sure all my other sewing supplies were purchased under similar circumstances.
Last weekend I stitched up two produce bags to use at the grocery store instead of those clear plastic bags that the store provides. About a year or so ago, I made two by combining instructions from a few different sites. This time, I tried to take my lessons learned and improve the end product. I used sheer fabric leftover from last time and just cut it into 2 equal rectangles. I did a double-fold hem along each short edge (top of the bag) and then folded the fabric in half and did a french seam along the sides. I inserted a piece of bias tape into the seam to use as a tie. I'm very pleased with the results. If I make any more, I intend to re-purpose old sheer curtains instead of purchasing new fabric.

This weekend I finished up a cloth napkin project I started around the same time as I made the original cloth bags. Although we've been regularly using the napkins I made back then, they are a bit too small. For this batch, I cut the fabric into 16" squares -- unfortunately, I only had enough for two napkins -- and then I did a double-fold hem along each edge. The finished products are about 15" square and just the right size.

Just because I think it's cool, check out my vintage green Singer sewing machine. It even has a lid that goes over it and snaps on to form its own carrying case.

According to my Google search, these machines were made between 1955 and 1964. The copyright on the machine manual is 1958. Also, please notice my awesome vintage pink plaid sewing basket. Inside, the markings on my measuring tape indicate it was made in West Germany (fyi - the wall fell in 1989). The trick to getting these ancient goodies? You need relatives who purchase things at yard sales and Goodwill just because they are in good condition and someone they know might need/use them some day. I believe my grandmother gave the sewing machine (along with many other "treasures") to my mother years ago just in case one of us girls wanted one. Turns out she was right this time. I'm pretty sure all my other sewing supplies were purchased under similar circumstances.
Saturday, April 30, 2011
First Seeds in the Ground!
Today was a beautiful warm and sunny day. When I came from the Urban Dare race, I found that J had erected the fence we were planning around our raised beds. It's just made out of 4' metal stakes and some heavy duty chicken wire, but we think it will be enough to keep the wildlife out. We get deer, rabbits and even turkeys wondering through our yard regularly.
We took (another) quick trip to Home Depot to pick up mulch for our flower bed and enough topsoil and manure to finish filling up our raised beds. Once we got the raised beds ready to go, I planted our first seeds in the ground -- two squares (9 seeds each) of sugar snap peas. For everything else, we will wait a few more weeks until the threat of frost is gone. I am trying to start our peppers (both bell and banana) inside, but no sprouts yet. I was worried that the pods weren't getting enough (or any?) sun in our office window, so I moved them downstairs. Sadly, our house doesn't get much natural light because of trees and the proximity of our neighbors.
This year I ordered most of our seeds from PA Seed Savers. There is apparently some restriction on the buying/selling of heirloom seeds in PA unless you are part of a club. Consequently, $2 of the shipping fees we paid actually purchased our annual membership. Kind of weird. I'm very excited about the seeds though. According to the website, PA Seed Savers serves to make more varieties of heirloom seeds legally available to PA residents, and heirloom varieties consistently grown here should adapt to our environment and become more fruitful.
Monday, April 25, 2011
Yogurt Chronicles II
I've been pondering yogurt...how on earth did people keep up with making yogurt before they could order the cultures in neat little packets from www.cheesemaking.com? I know in theory that the previous batch can be used to culture a new batch, but my understanding is that the cultures will eventually die out. Plus that means you need to continually make a new batch before the old batch is gone. Hmm...
Anyways, this led me to my little experiment. As usual, I divided 1/2 gallon of creamline milk between two mason jars and followed my usual method. I followed the directions on the yogurt package and added the whole thing to one jar (previously I used 1/2 and 2/3 of the packet). To the other jar, I added about 2 T of my previous yogurt batch, strained to make it a bit thicker. I then let the yogurt culture for about 16 hours. Of course, I forgot to add more hot water before I went to bed, but I don't think it made a difference. One less step...
The yogurt made from the culture packet was noticeably thicker than my previous batches but still not as thick as store bought yogurt. The yogurt made from re-cultured yogurt turned out exactly the same as the previous batch - relatively thin. So that answers one question -- yes, the cultures can be reused. I wonder how long that will continue to work? Regardless, that should save a few pennies on purchased cultures. If I use a full packet in each jar and then reculture it at least once, that should yield a thicker yogurt for the same price as using only a half packet in each jar. Who said I wasn't frugal??

In the photos above, you can see that the yogurt made from re-cultured yogurt (left) has quite a bit more whey visible.
Anyways, this led me to my little experiment. As usual, I divided 1/2 gallon of creamline milk between two mason jars and followed my usual method. I followed the directions on the yogurt package and added the whole thing to one jar (previously I used 1/2 and 2/3 of the packet). To the other jar, I added about 2 T of my previous yogurt batch, strained to make it a bit thicker. I then let the yogurt culture for about 16 hours. Of course, I forgot to add more hot water before I went to bed, but I don't think it made a difference. One less step...
The yogurt made from the culture packet was noticeably thicker than my previous batches but still not as thick as store bought yogurt. The yogurt made from re-cultured yogurt turned out exactly the same as the previous batch - relatively thin. So that answers one question -- yes, the cultures can be reused. I wonder how long that will continue to work? Regardless, that should save a few pennies on purchased cultures. If I use a full packet in each jar and then reculture it at least once, that should yield a thicker yogurt for the same price as using only a half packet in each jar. Who said I wasn't frugal??


In the photos above, you can see that the yogurt made from re-cultured yogurt (left) has quite a bit more whey visible.
Flower Bed
During a trip to Home Depot this weekend, we got sucked in by all the pretty flowers on display. We walked in planning to purchase a propane tank and walked out with a cartful of flowers (and the propane tank).
We live in a rental with a large yard, but much of it is covered in overgrown shrubbery and scraggly trees. However, there was a patch of dirt to the right of our front door where someone clearly had a garden at one point. J did a great job clearing it out, pulling up old roots and turning up the soil. Much of the patch only gets partial sun, so we had to be strategic in picking a variety of plants that would flourish in these conditions.

I'm most excited by the peony plant in the back right corner that was an Easter gift from my mother. Once we get some mulch down and the plants establish themselves, I think the front of our house will look pretty respectable.
Wednesday, April 20, 2011
Seedlings
I was so excited to see my first little sprouts poking up through the dirt this afternoon. My lettuce is making an appearance. See the little green specks? I swear they are there!


I'm getting a little antsy for the seeds I ordered to come in the mail. I ordered them a week and a half ago. I need to get my peas in the ground and my pepper seeds started inside. Maybe they'll show up tomorrow...


I'm getting a little antsy for the seeds I ordered to come in the mail. I ordered them a week and a half ago. I need to get my peas in the ground and my pepper seeds started inside. Maybe they'll show up tomorrow...
Thursday, April 14, 2011
It's Spring!
Look at my chives! We just left the pot outside all winter and all of the sudden they were 5 inches tall. I had no idea that chives were perennials. Nice!

It's only April and I'm already behind on my gardening plan. I'm trying to catch up though. I ordered pea, bean and pepper seeds earlier this week. Tonight I sowed left-over-from-last-year lettuce and arugula seeds in containers. I also re-potted a houseplant that has miraculously survived a too small container and my black thumb for over a year now.
J built our beautiful 2' x 6' garden boxes and dug out space for them in the yard a few weeks ago. Now we just need some more dirt and warmer weather. (Before the boxes were in place, we were worried the neighbors were going to think we had buried bodies in our yard!)

Tuesday, April 5, 2011
Yogurt Chronicles I
I've made yogurt several times now, and I still trying to figure out the most efficient way to get the best yogurt. Although I started with the crockpot method, lately I've been following Kitchen Stewardship's instructions. My first few attempts at yogurt I used store bought plain yogurt as the culture, but now I'm experimenting with the awesome yogurt cultures I got for Christmas. Yogurt naturally comes in different flavors...who knew?
On my first attempt using the cultures, I divided one packet between 2 mason jars of milk. (Per the directions, I should have added a packet to each jar.) I let it incubate for probably 4 or 5 hours. The flavor was fantastic -- sweeter and not as tart as regular plain yogurt. However, the consistency was almost that of a drinkable yogurt. I ended up straining most of it through cheesecloth.
This time, I divided 3/4 gallon of creamline milk between 3 mason jars. After heating the milk to 185 degrees and then allowing it to cool on the counter to 112 degrees, I evenly divided two packets of cultures between the 3 jars (~1/4 tsp each). I let the yogurt incubate in a cooler for about 14 hours, adding more boiling water after 5 hours (before I went to bed). I'm pretty pleased with the results. I wish the yogurt was a smidge thicker, but that's nothing that a bit of cheesecloth can't fix.

Subscribe to:
Posts (Atom)